Wedding DIY: Paperback book-covered flower jars – Vintage-styled centerpieces

photo (52)

My friend Zee came over after a morning hike yesterday to help me craft for my upcoming wedding. More accurately, I shared my vision with her, borrowing from this idea, and she executed all of them with laser-focused efficiency (thanks, Zee!). While she was doing that, I was busy cutting tiny fabric circles to make these (to be blogged in a separate post soon).

photo (53)

Zee’s handiwork – 14 drying jars

photo (50)

profile shot

photo (49)

ready for its close-up

How it’s done 

We tore the pages out of a paperback book, halved them, and Mod Podged the edges onto 32-oz Mason jars. Let them dry. Then I hot-glued the ribbon to one side of the paper doily heart and glued it to the jar. Once that was affixed, I glued the other side (ribbon, then heart) into place.

Crispy, Chewy Peanut Butter Cookies

I’ve shied away from making peanut butter cookies for years now – probably since Home Economics in high school – because they’re too rich and too sweet for me.

Or so I thought. This past weekend, I wanted to try a different cookie from my usual line-up and I had a jar of crunchy peanut butter with probably 3 tablespoons left, so I tried Deb’s peanut butter cookie recipe. She adapted the recipe from the Magnolia Bakery cookbook (“Wait, Magnolia makes more than just cupcakes?”).

These are the lightest peanut butter cookies I’ve tasted. And they fit my perfect cookie prototype of crispy exterior / chewy interior. I think it’s preferable to use crunchy peanut butter for the texture and I added rolled oats for texture.  The next time I make these I might try adding even more oats. You can do the same, just be sure to adjust the ratio of flour to oats. 1:1 seemed to work for me (i.e., I replaced ½ cup of flour with oats).

Also, the original recipe called for both peanut butter and chocolate chips, but I don’t think either is needed. In fact, I feel again that the sweetness can maybe be cut down just a bit. But really, that’s very optional. They’re great at the current level of sweetness. It’s dangerously easy to put down like half of dozen of them in 15 minutes.

photo (21)

fresh out of the oven

photo (22)

different angle, anyone?

photo (23)

let the scarfing begin

Peanut Butter Cookies (Adapted from Smitten Kitchen)

3/4 cups wheat flour
1/2 cup rolled oats
3/4 teaspoon baking soda
1/2 teaspoon baking powder
1/4 teaspoon salt
1/2 cup unsalted butter, softened
1 cup peanut butter at room temperature (crunchy)
3/4 cup, minus 1 Tbsp, sugar
1/2 cup loosely packed light brown sugar
1 large egg, at room temperature
1 tablespoon milk
1 teaspoon vanilla extract
Optional, for sprinkling: 1 tablespoon sugar, regular or superfine

  1. Preheat oven to 350 degrees. In a large bowl, combine the flour, the baking soda, the baking powder, and the salt. Set aside.
  2. In a large bowl, beat the butter and the peanut butter together until fluffy.
  3. Add the sugars and beat until smooth. Add the egg and mix well. Add the milk and the vanilla extract. Add the flour mixture and beat thoroughly.
  4. Stir in the peanut butter and chocolate chips. Place sprinkling sugar — the remaining tablespoon — on a plate.
  5. Drop by rounded teaspoonfuls into the sugar, then onto ungreased cookie sheets, leaving several inches between for expansion.
  6. Using a fork, lightly indent with a criss-cross pattern. I like my cookies on the flatter side so I flattened the cookies a good amount while doing this and got good results.
  7. Bake for 10 to 12 minutes. Do not overbake. Cookies may appear to be underdone, but they are not.
  8. Cool the cookies on the sheets for 1 minute, then remove to a rack to cool completely.

Apple/Peach Streusel Oat Squares

For some reason I’ve never had real success with jam squares. I’m not sure why that is – they don’t seem particularly challenging: Take a straightforward oat mixture, spread and flatten in a pan, add a layer of jam or preserves and a 2nd layer of oat base mixture.  Maybe add a crumble topping. I love my crumble toppings. And yet I have never been able to strike the right balance between the crumbly oat mixture (not sweet enough) and the sweet center filling (often too sweet).

Until now. In perusing my new favorite blog, which I initially arrived at in searching for green juice/smoothie recipes (which Angela affectionately calls “Green Monsters”), I came across this recipe. I had most of the ingredients, including some apples that had passed their prime and a huge bag of oats in the pantry, so it was perfect timing.

I made a few omissions and revisions out of necessity and sometimes whim. Because I was using some sweeter fruits (a Fuji apple which was on the verge, a Granny Smith  that was getting close to the verge, and a peach), I cut a little sugar in the apple/peach mixture (original recipe calls for 3 Granny Smiths). I didn’t have ground ginger so I omitted that. I didn’t have vanilla so I used a natural vanilla sweetener—just a couple drops because it was extremely potent. Nor did I have maple syrup, so I used the rest of my agave. I love oat crumble so I added a healthy dose of oats to the crumble and loved the texture it gave it.

This was a first for me—baking with an egg replacement. Gel eggs can be created using flax or chia seeds (or a combo of both) and some recipes call for you to grind the seeds and let the mixture thicken in the fridge. I did neither and my chia egg turned out fine (need to make note of this the next time I want to bake and don’t have eggs). This recipe would be dairy-free if I’d used the Earth Balance like the recipe called, but I couldn’t resist using real butter.

The result: Perfectly crumbly, chewy bars with a moist filling. Perfect for fall (or late summer). I may or may not have eaten 3 pieces straight out of the oven.

I just love 1st time recipes that turn out well and use up stuff in the fridge!

photo (24)

photo (27)

photo (30)

photo (31)

The finished product. Serve while still warm a la mode…

photo (33)

…or on their own, bite-sized.

Buttery Apple/Peach Streusel Oat Squares (adapted from OhSheGlows.com)

For Oat Base:
1.5 cups regular oats
1 cup whole wheat flour
1/2 tsp baking soda
1/2 tsp kosher salt
1/2 cup Sucanat sugar (or brown sugar)
1 chia egg (1 tbsp chia seeds+ 4 tbsp warm water, mixed well and set aside for 5 mins)
1/2 cup + 2 tbsp Earth Balance, melted
1/4 cup agave syrup (originally called for pure maple syrup)
1 tsp pure vanilla extract (replaced with a  couple drops of natural vanilla sweetener)
2 tbsp almond milk

For Fruit Mixture:
2 apples, 1 peach (or any combo of apples, peaches, nectarines)
2 Tbsp Earth Balance or butter
1 Tbsp maple syrup or brown rice syrup
1 Tbsp Sucanat (or brown sugar)
3/4 tsp cinnamon
1/4 tsp nutmeg
Pinch kosher salt
Pinch of vanilla sea salt (from Chelsea Filling Station in NYC.  Did I mention that I love that place?)

For Apple Streusel Topping:
2 Tbsp brown sugar
1 Tbsp butter
2 Tbsp flour
3 Tbsp oats
1/2 tsp ground cinnamon

  1. Preheat oven to 350F. Line a square pan (I used a 9×9) with parchment paper and oil the sides of the pan and base. In a medium sized pot, add the fruit mixture ingredients (chopped apples, butter, agave/maple syrup, spices). Heat over low, stirring frequently for about 10 minutes, until the fruit softens and mixture thickens up.
  2. In a small dish/bowl, mix the chia or flax egg and set aside (or in the fridge). In a large bowl, mix the oat base dry ingredients: oats, flour, brown sugar, baking soda, salt.
  3. In a small mixing bowl, mix the melted earth balance, maple syrup (or agave), almond milk, vanilla, and chia egg. Stir well.
  4. Add the wet mixture to the dry and mix well.
  5. Set aside 1/2 cup of the oat base mixture.
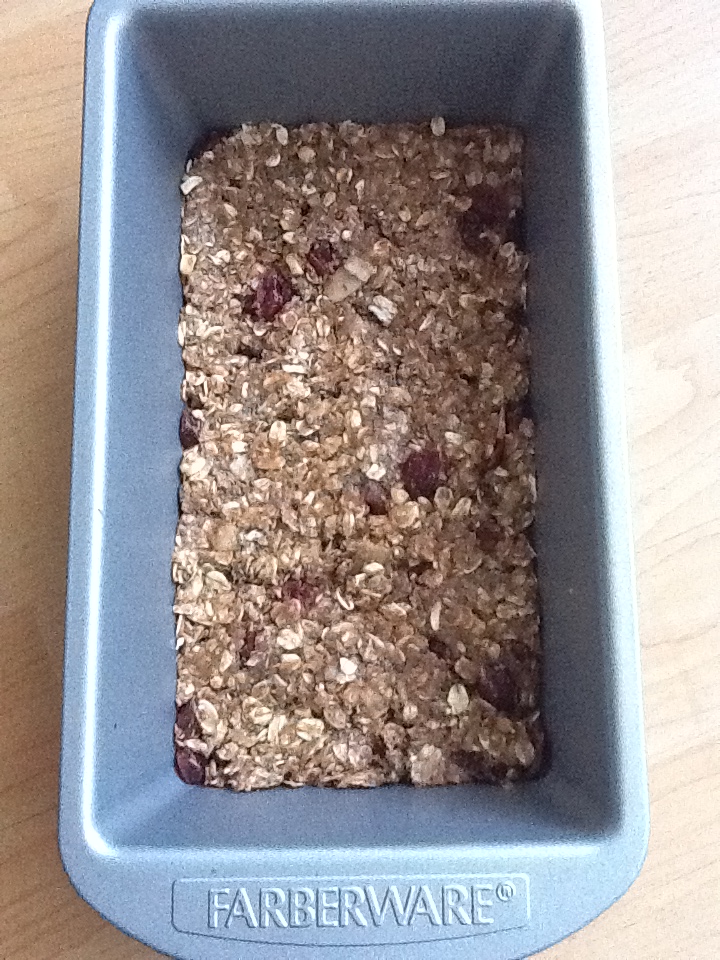
  6. Pour the oat mixture onto the square pan and press down with fingers. Use a pastry roller to smooth out if desired. Pour on cooked apple mixture and smooth out.
  7. Make the streusel topping by mixing all ingredients together with a fork or fingers. Now sprinkle on the reserved 1/2 cup oat mixture and apple streusel topping and sprinkle over top.
  8. Bake at 350F for approximately 30 minutes. Allow to fully cool for at least 30-40 minutes before gently removing from pan. You can firm them up in the fridge before slicing into squares or bars (but they’re so good warm!) Apparently, the bars also freeze very well, if they last that long.

Turkey Meatballs (because I love turkey… and meatballs)

We didn’t have a problem eating ours.

Yup, this is a non-baking entry that I have to post because they came out so well. I made these turkey meatballs on the smaller side, about 3/4-inch in diameter, so they cooked faster (the original recipe calls for them to be finished in broth). Make sure to season generously as it really makes a difference. I love that this recipe sneaks in vegetables – probably helpful for moms out there with young picky eaters. I used a summer squash since that’s what I had in the fridge and I think I actually used a little more than ½ cup. Vegetables make a great filler for meatballs and dumplings!

The finished product is so good. The first night I used them in spaghetti and the second night I made a simple gravy to pour over them with mini ravioli. But they’re seasoned so well that they’re pretty much good on their own, maybe with a side of cabbage or broccoli rabe. Rave reviews from my taste tester. Not bad for my first time!

Sorry, no pictures! They were not the most photogenic meatballs, but they were delicious! MarthaStewart.com has a great picture of them, though.

Turkey Meatballs (adapted from Jessica Alba’s recipe on MarthaStewart.com)

2 pounds lean ground turkey
1 cup panko (Japanese breadcrumbs)
1/4 cup finely chopped shallots
2 large eggs
2 tablespoons Italian seasoning
1 tablespoon coarse sea salt
Dash of smoked alderwood salt (from Chelsea Filling Station in NYC. I love this stuff!)
Dash of freshly ground pepper
2 tablespoons olive oil
3/4 cup homemade or store-bought low-sodium chicken broth
1/2 cup finely chopped summer squash (or some other squash. Original recipe called for 1/4 cup finely chopped carrots and 1/4 cup finely chopped zucchini)

  1. In a large bowl, mix turkey, panko, squash (or carrots, zucchini), shallots, eggs, Italian seasoning, salt and pepper until well combined; form into 3/4-inch balls.
  2. Heat olive oil in a large skillet over medium heat. Add meatballs and cook, turning, until browned, about 7-8 minutes.
  3. Test the meatballs for doneness: Make sure they’re cooked through (no longer pink in the center).

No-Bake Energy Bites / Bars / Mini-Muffins

That’s right – these are ridiculously easy and extremely versatile. Just make sure to play with the quantities of wet to dry ingredients to make sure the mixture adheres properly. One bowl, no bake, with the right amount of sweetness.

photo (48)

photo (34)

photo (35)

photo (47)

Yes, it was a brand new mini-muffin tin.

photo (46)

photo (45)

No-Bake Energy Bites (Adapted from Gimme Some Oven)

1 cup rolled oats
2/3 cup toasted coconut flakes or chips (I love these from Trader Joe’s – they give an extra little crunch)
1/2 cup peanut butter or other nut butter
1/2 cup ground flaxseed or wheat germ (I used ground flaxseed)
1/3 cup honey or maple syrup
1 tsp vanilla extract

Optional add-ins
1 Tbsp chia seeds
2 Tbsp chopped nuts (any kind)
1/2 cup chocolate chips or cacao nibs
1/2 cup dried cranberry

  1. Stir all ingredients together in a medium bowl until thoroughly mixed. Cover and let chill in the refrigerator for half an hour.

  2. Once chilled, roll into balls, into a cake pan, mini-muffin tin — really whatever shape you’d like.

For my next batch, I’m going to try making them with maple syrup and forming them into these shapes. Don’t they look like buttons?

I agree, Todd. Thank you!

Todd VanDerWerff from AV Club makes a thorough and well-thought out argument for ABC Family to just renew Bunheads already.

My favorite part:

“…the best argument to make at this point is the qualitative one: This show is so good that ABC Family should renew it simply on those grounds. TV history is littered with one-season wonders, but it’s got even more shows that started out slowly in season one and were renewed by gutsy network execs who either really liked the show or saw the potential for growth in it, against all odds. Some—CheersSeinfeldGilmore Girls—went on to be hits for their networks, while some—Better Off TedBoomtownEnlightened—didn’t manage that trick. But all of those shows and many more that made it to unlikely second seasons have something in common: They made the qualitative argument first, giving them more time to make the quantitative one.”

Yes, exactly. Thank you. I cannot agree with this enough.

What I did yesterday morning when I should have been working

My overripe bananas and general lack of cake were calling to me. I used Deb’s recipe from Smitten Kitchen and omitted the cloves and the bourbon. This was so easy to put together and turned out beautifully, it was super moist and had just the right amount of sweetness. Although, on a whim, I threw in about 1/3 cup of semi-sweet chocolate chips at the end. Can’t beat the combination of chocolate and banana. [EDITED 8/20/13] And how can I forget one of the best things about this recipe? That it’s a one-bowl recipe and requires no mixer!

photo (16)

Sprinkled on the top is espresso salt, which I’ve been using a lot in my baking

photo (14)

Banana Bread/Cake (Adapted from Smitten Kitchen)

3 to 4 ripe bananas, smashed [EDITED 8/20/13] For best results, use 4 ripe bananas
1/3 cup melted salted butter (I added a little more)
3/4 cup light brown sugar
1 egg, beaten
1 teaspoon vanilla
1 teaspoon baking soda
generous pinch of Kosher salt
1 teaspoon cinnamon (I used about a Tablespoon of cinnamon sugar because I couldn’t find my cinnamon)
1/2 teaspoon nutmeg
1 1/2 cup of whole wheat flour

  1. Preheat oven to 350°F.
  2. With a wooden spoon, mix butter into the mashed bananas in a large mixing bowl.
  3. Mix in the sugar, egg, vanilla, then the spices. Sprinkle the baking soda and salt over the mixture and mix in. Add the flour last, mix.
  4. Pour mixture into a buttered or Pam-sprayed 8×8” square pan or of course a loaf pan. I only used the square pan because I didn’t have a loaf pan. (As luck would have it, I received a loaf pan in the mail a couple hours later as an early birthday present)
  5. Bake for 30-35 minutes or until a tester comes out clean (For a loaf pan, original recipe calls for 50 minutes to one hour) Cool on a rack. Remove from pan and slice to serve.